
No-Code Data Replication from RDS to S3 and Snowflake
Overview There are multiple ways to replicate data from an Amazon RDS instance to your preferred analytics platform. An …

My journey into smart home automation began with Samsung SmartThings, which worked well initially. However, as Samsung discontinued the original SmartThings, Aeotec took over with a new version. While the new version was effective, I wanted something more customizable and powerful.
I had come across Home Assistant before but had avoided it due to the time and effort required to set it up. However, no other platform offered the level of customization I needed, so I finally decided to give it a try.
In this post, I’ll walk you through the basics of setting up Home Assistant using Hyper-V and configuring it to manage your smart home devices.
Home Assistant is an open-source platform designed to be the central hub for your smart home automation. It can connect to countless devices and platforms, allowing you to control and automate everything from lights to thermostats. What sets Home Assistant apart is its flexibility—whether you’re a beginner or a power user, it offers full control over how you automate your home.
Home Assistant (HA) can be installed on a variety of devices, including Raspberry Pi, mini PCs, or even dedicated servers, making it incredibly versatile for different setups. However, in this guide, we will specifically focus on setting up Home Assistant in a Hyper-V virtual machine. Hyper-V, available on Windows, is a great option for those who prefer virtual machines over dedicated hardware.
By following this step-by-step guide, you’ll be able to install Home Assistant on Hyper-V and start managing your smart home devices with ease.
Create a New Hyper-V Virtual Machine:
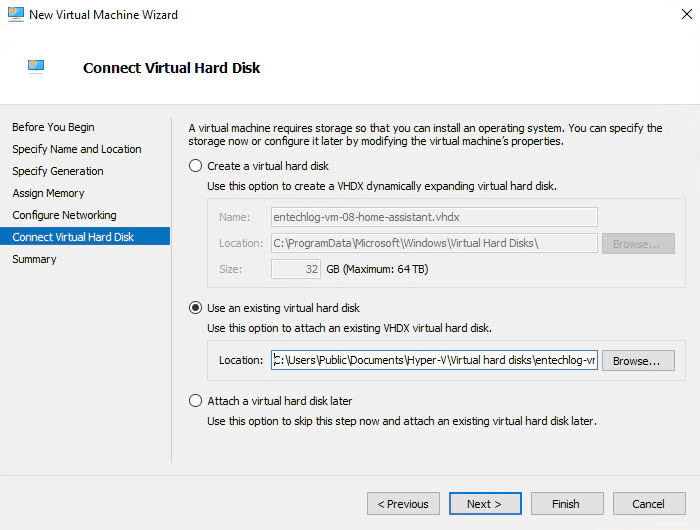
Download the Hyper-V (.vhdx) image from the official Home Assistant website.
Set up a new virtual machine in Hyper-V.
Select Generation 2.
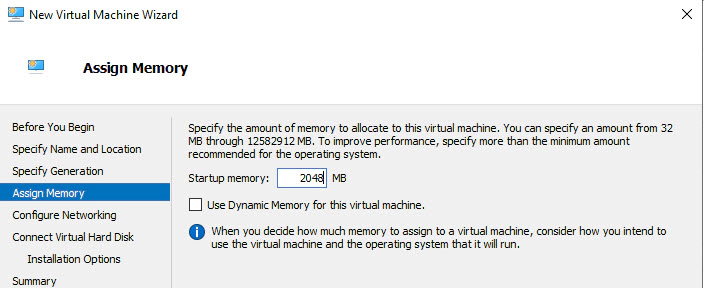
Assign Memory (atleast 2048) and Select your bridged Virtual Switch under connection.
Choose to use an existing virtual hard disk, selecting the downloaded VHDX file and finish the new virtual machine setup process.
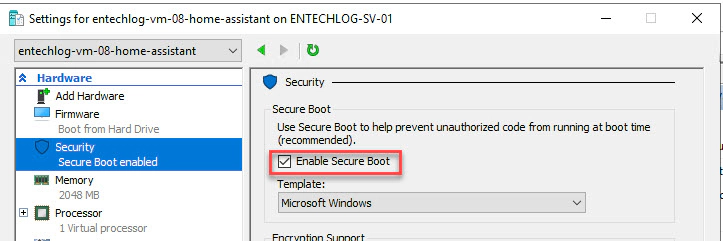
Go to the Security settings and disable Secure Boot.
Start the Virtual Machine:
Once the VM is running, navigate to http://homeassistant.local:8123/ in your browser to begin the setup process.
Once the virtual machine is running, Home Assistant will guide you through its setup. Here are the steps:
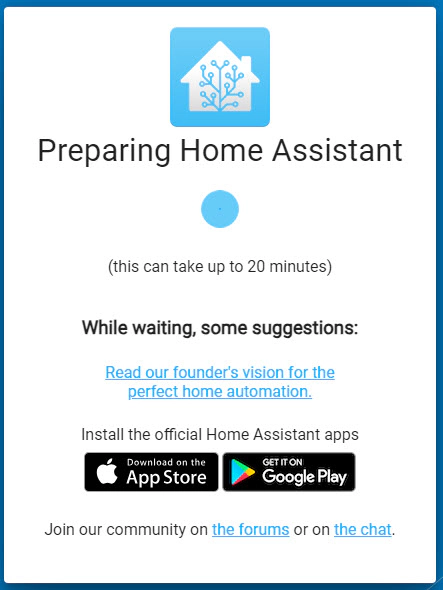
After opening http://homeassistant.local:8123/, you’ll see a Preparing Home Assistant page. The platform will download the latest version (around 700 MB), which may take some time depending on your hardware and internet connection.
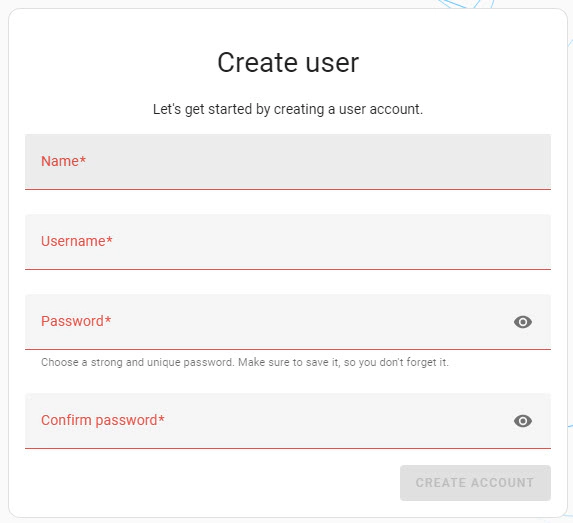
Home Assistant will prompt you to create the owner’s account. This is an administrator account that can control everything within your smart home. Be sure to store your username and password somewhere safe, as there’s no recovery option.
The home location configures your time zone, unit system, and home zone radius. You can use this information for automations such as turning on lights at sunset or starting your vacuum when you leave the house.
Home Assistant provides the option to share anonymized data to help improve the platform. This is completely optional but can be helpful for development.
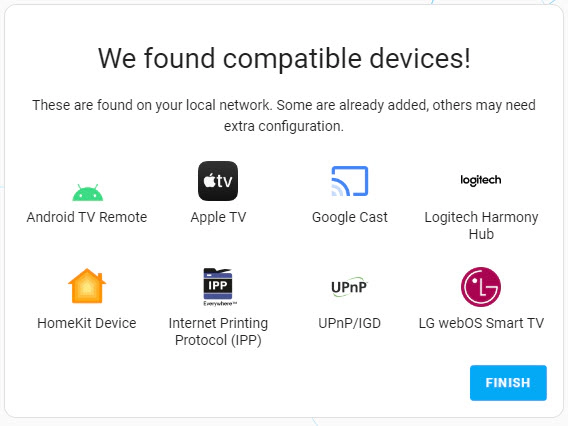
Home Assistant automatically discovers smart devices on your network. Don’t worry if some devices don’t show up right away—you can manually add them later.
As you dive into Home Assistant, it helps to understand a few key concepts:
| Term | Description |
|---|---|
| Integrations | Connects Home Assistant to other platforms (e.g., Philips Hue) |
| Entities | Represents individual data points, such as sensors or device states |
| Devices | A group of entities, like a motion sensor with temperature and light levels |
| Areas | Logical groupings of devices (e.g., Living Room) |
| Automations | Actions triggered by specific events, such as turning on lights at sunset |
| Scripts | Repeatable actions without a trigger, often used in automations |
| Scenes | Predefined device settings, like dimming the lights for a movie scene |
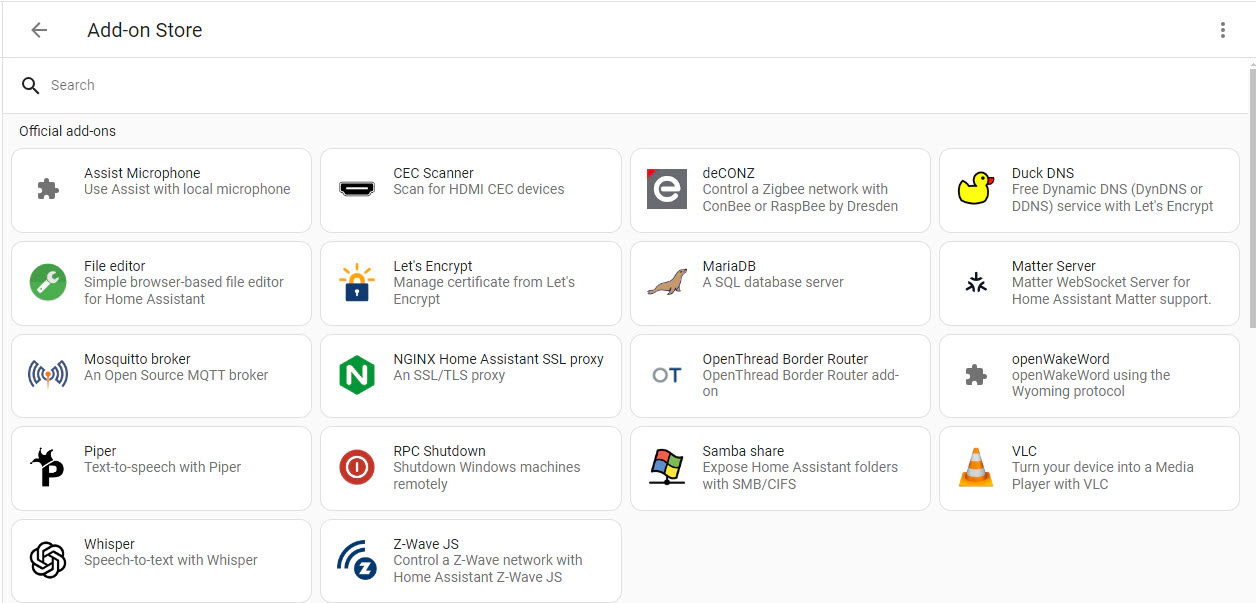
| Add-ons | Third-party apps that extend Home Assistant’s functionality, installed under Settings > Add-ons |
| HACS | A community-driven add-on store for Home Assistant that allows you to easily install custom integrations, themes, and Lovelace cards |
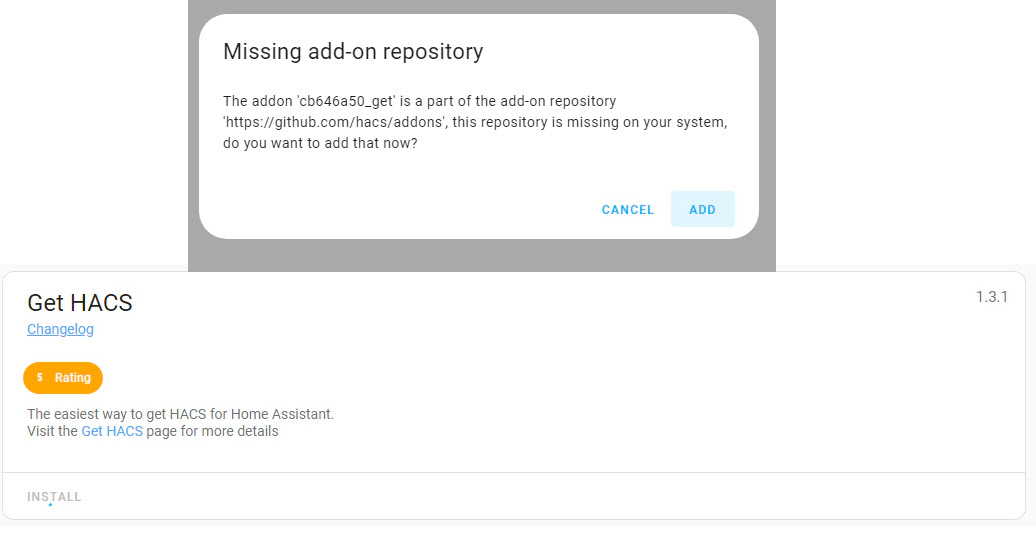
To enhance Home Assistant, you’ll want to install HACS (Home Assistant Community Store) for custom integrations, themes, and Lovelace cards:
Follow the instructions from the HACS website to download and configure it. For this installation, we’ll be following the instructions for the Home Assistant OS/Supervised version.
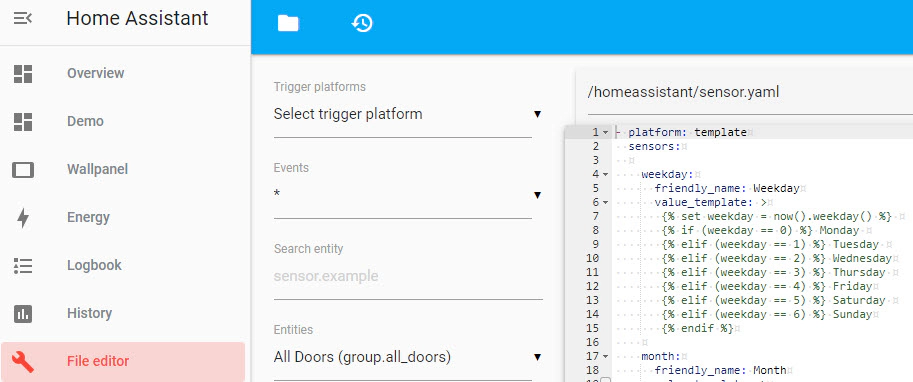
Enable the File Editor: Under Settings > Add-ons, enable the file editor. This will allow you to modify sensor and config files easily.
Custom Repos for a Better Dashboard: Once HACS is installed, you can add custom repositories like:
| Custom Repos | URL |
|---|---|
| layout-card | https://github.com/thomasloven/lovelace-layout-card |
| button-card | https://github.com/custom-cards/button-card |
| vertical-stack-in-card | https://github.com/ofekashery/vertical-stack-in-card |
| lovelace-mushroom | https://github.com/piitaya/lovelace-mushroom |
| mini-media-player | https://github.com/kalkih/mini-media-player |
| browser-mod | https://github.com/thomasloven/hass-browser_mod |
| simple-weather-card | https://github.com/kalkih/simple-weather-card |
| card-mod | https://github.com/thomasloven/lovelace-card-mod |
| Custom Brand Icons | https://github.com/thomasloven/lovelace-card-mod |
Customizing your dashboard is one of the most exciting parts of Home Assistant. Here’s a step-by-step guide to creating your personalized dashboard, from configuring YAML files to applying themes.
First, you’ll need to create a few YAML files to define your smart home’s structure.
Once these files are created, you can start adding your smart home configurations. To follow along with the theme setup in this guide, you’ll need the example configuration files from my GitHub repository. Update the groups and sensors based on your devices.
Themes allow you to customize the appearance of your Home Assistant dashboard. Let’s install one!
Download the Theme File:
Copy the Theme File to the Themes Directory:
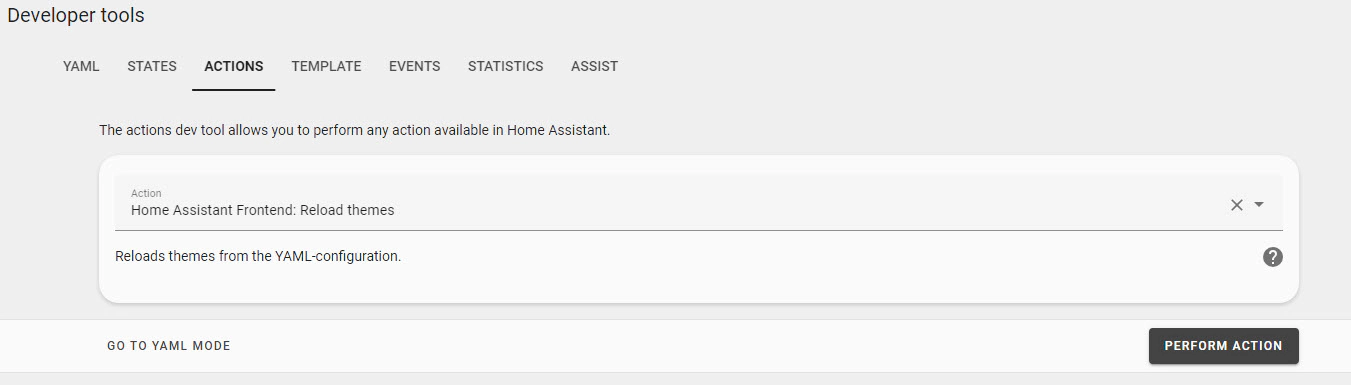
Reload Themes in Home Assistant:
Activate the Theme:
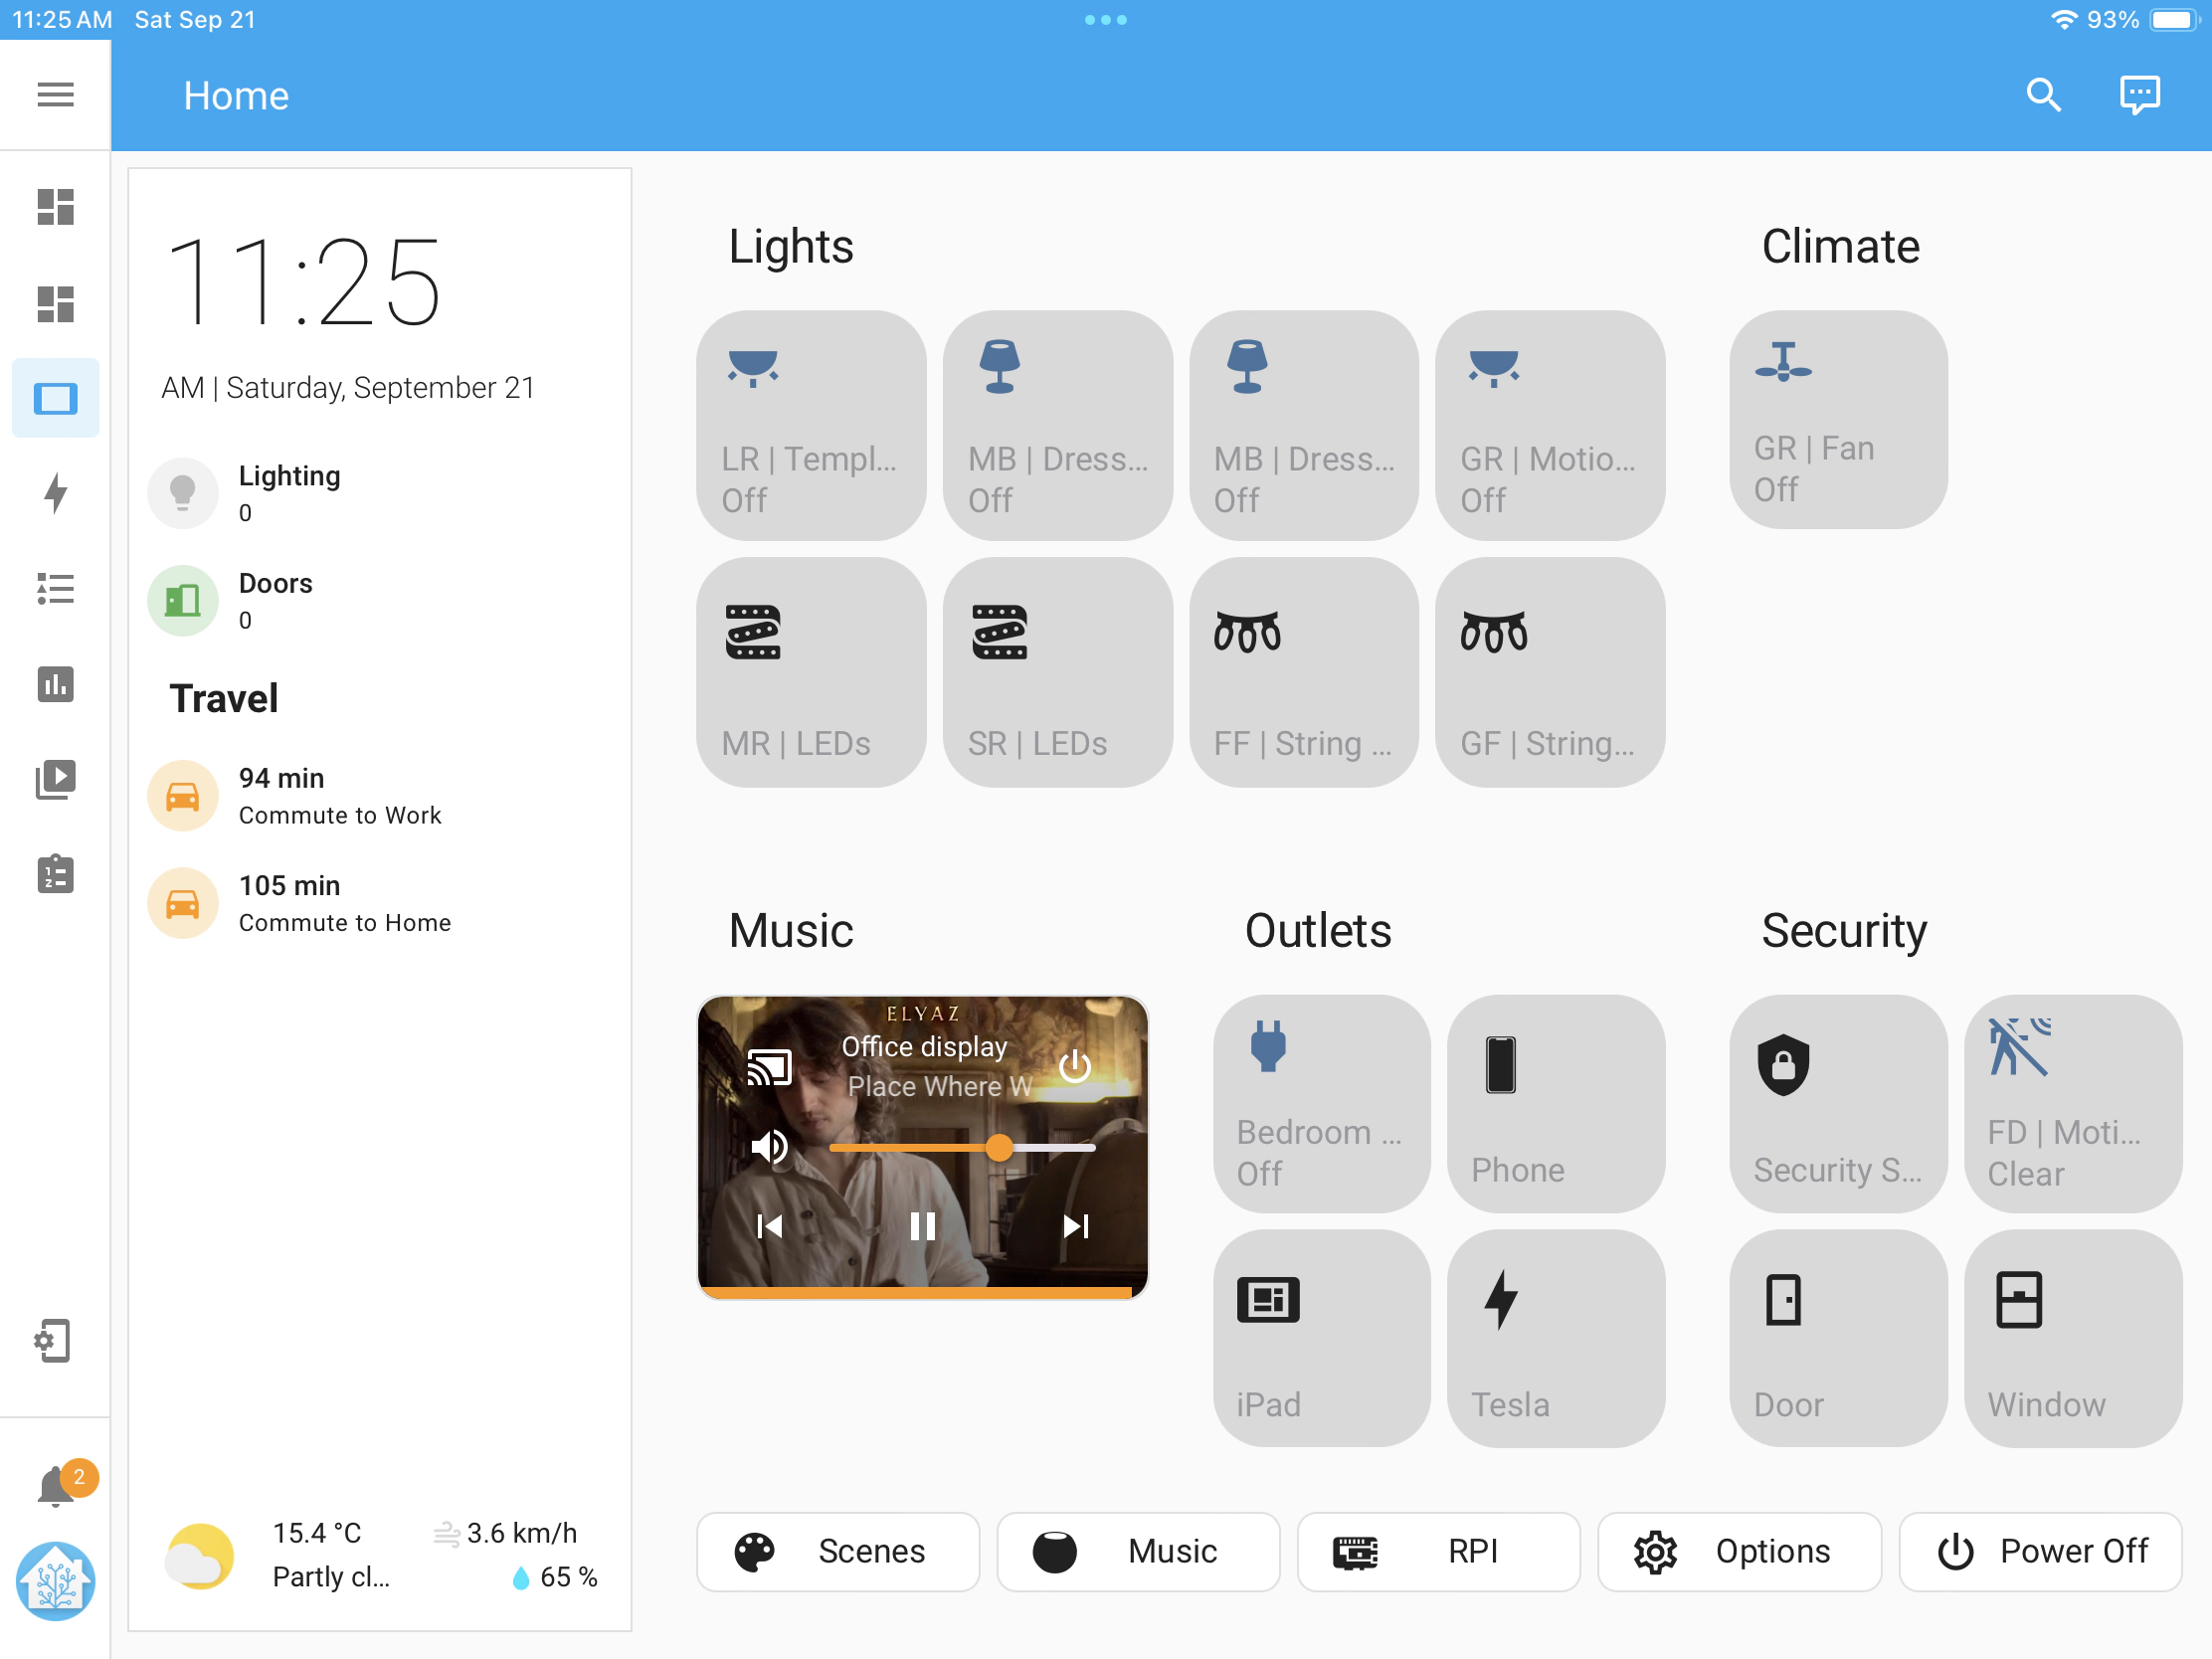
With your configurations and themes in place, it’s time to create your custom dashboard.
Create a New Dashboard:
Edit the Dashboard:
Import Dashboard Configuration:
Save and View Your Dashboard:
By following these steps, you’ll have a fully functional and personalized Home Assistant dashboard, complete with a theme, YAML configurations, and smart device management. Enjoy your new smart home control center!
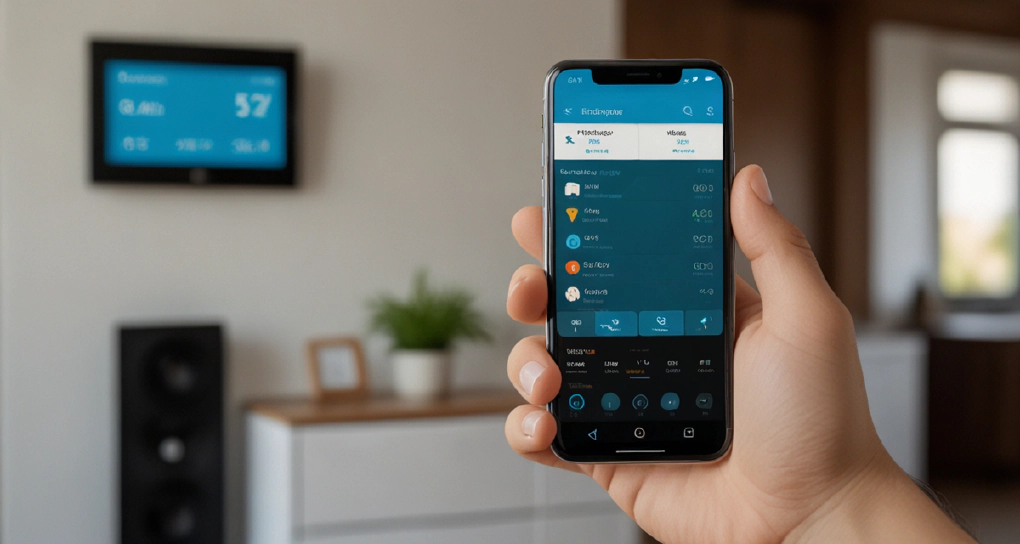
Once you’ve set up your wall-mounted dashboard in Home Assistant, the next step is to physically mount it in your home. A well-placed, easily accessible dashboard makes controlling your smart home more convenient and adds a touch of modern tech to your space.
The most cost-effective way to create a wall-mounted dashboard is by repurposing an old Android tablet. If you have one lying around, it’s perfect for displaying your Home Assistant dashboard without having to buy new hardware.
To keep your tablet running efficiently as a dedicated dashboard, you’ll need to install software that ensures the tablet stays online 24/7. I recommend using Fully Kiosk Browser, which transforms your tablet into a full-time kiosk display.
Key Features of Fully Kiosk:
Now that your tablet is ready, you’ll need to mount it securely to the wall. The type of mount you choose depends on your preference for ease of removal and aesthetics:
With Home Assistant up and running, you now have a powerful tool for managing and automating your smart home. Whether you’re just getting started or looking to customize every aspect of your home, Home Assistant offers endless possibilities.
Hope this was helpful. Did I miss something ? Let me know in the comments.
This blog represents my own viewpoints and not those of my employer. All product names, logos, and brands are the property of their respective owners.
Overview There are multiple ways to replicate data from an Amazon RDS instance to your preferred analytics platform. An …

What is Orchestration ? Orchestration in the context of IT and software development refers to the automated …